Product images in descriptions
This module makes it possible to improve SEO on Google by enriching the content of the description thanks to the figure and figcaption tags. It also improves rendering by zooming in on the image and specific customization possible for each image.
![]()
Module objectives
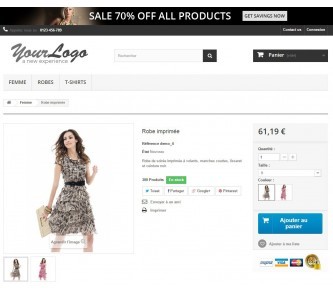
Displaying a "simple" image is already possible in the description of the products but it is barely functional, without zooming and nothing is done to optimize the referencing whether in terms of tags or lazy loading.
My module allows:
- insert figure and figcaption tags in product descriptions and in CMS pages
- improve SEO by inserting personalized content from the title, alt and figcaption fields
- to create a zoom allowing to see in detail the images of the products
- to make the content easily customizable
- not to weigh down the page and not slow down the loading time in order to score points with Google
Principle
The figure and figcaption tags do not work natively on PrestaShop, so you need a module to be able to include them and improve the content of the descriptions.
Not only does this module display the image very easily for the user, it also includes a zoom on the image. The formats of the images are selectable in the configuration of the module. For the large image you can even select the original image format (not modified by PrestaShop).
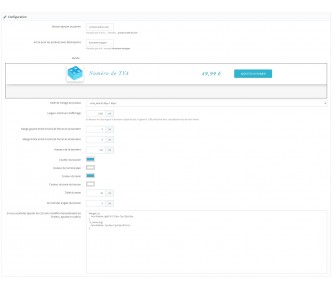
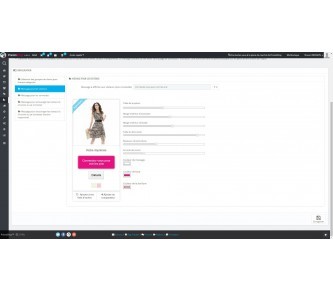
Module configuration
The first choice relates to the format of the image, the dimensions in pixels are indicated in parentheses.
Then you can choose the size of the zoomed image, you can even choose the native image that you loaded (in this case the pixel dimensions are not indicated because they differ for each image).

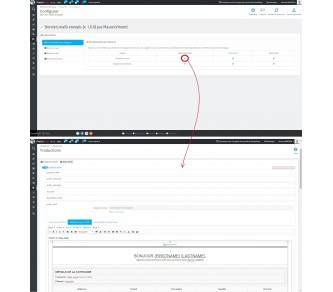
Displaying the <figure> element with a specific image
The code to insert must start and end with # # # and contain at least the image id (of any product).
Example to display the image whose image_id is 12:
## #12# ##

Zoom
To display the large image, simply configure the size of your choice for the large image in the back office.
By default Prestashop adds white bands on the images, you can avoid this with the "thumbnail image manager" module.
The biggest defect on the images produced is the zoom, by default with PrestaShop it takes the height of the screen with a margin at the top and the title and a margin at the bottom and the scroll is impossible, suddenly if you with an image in portrait mode that exceeds the height of the screen, it cannot be displayed without being reduced and therefore the content becomes difficult to read, or even illegible. This module allows you to include the image in the description, the scroll becoming possible the image is not limited to the height of the screen, so you have a visible and perfectly readable image.
Example of a height image whose native display is unreadable and cannot be used by PrestaShop:

You can find this image on the description page of the "list of combinations" module.
Improvement of SEO by information available and scrutinized by search engines
It is possible to indicate the title and alt field of the image as well as the figcaption (legend of the figure) very easily:
###id_image¤title¤alt¤figcaption###
The code begins and ends with # # # and we find between these 2 ends:
- id_image
- content of the title field
- content of the alt field
- content of the figcaption tag
If you don't give any information for one of these parameters (title, alt and figcaption), instead of leaving an empty element, the name of the product will be indicated (as in the first example with # # # 12 # # #). For SEO it's better than nothing, but we can do better.
Example :
###12¤Pretty yellow dress¤Yellow dress¤yellow floral pattern###
The title field will be Pretty yellow dress
The alt field will be Yellow dress
Figcaption sera yellow floral pattern

Customizing the rendering
Now that we have seen how to display a product image and have a better referencing by filling in the important fields, we can improve the rendering in order to have a more personalized rendering, this module is also made to please your customers.
The rendering of each image (and of the figure and figcaption tags) can be personalized very easily, just indicate the name of the class in the 5th position:
# # # id_image¤title¤alt¤figcaption¤class # # #
The name of the class is attributed to the figure tag (which makes it easier to personalize the whole but also the content: the image and figcaption tags).
Then all you have to do is configure the class in the module configuration. You can have a common class for different images and at the same time have specific classes for each image.
Example of rendering with a class:

The borders class is set to display a border around the image, a border around figcaption, and a border with rounded corners around the set.
Example of rendering with several class: if you want to have on 3 images the same frame (borders and margins between the elements) but have a background color of the figcaption specific to the product:
First picture (with the yellow dress): # # # 123 yellow dress yellow dress yellow dress yellow borders # # #
Second picture (with the blue dress): # # # 456 blue dress blue dress blue dress blue borders # # #
Third picture (with the orange dress): # # # 789 ¤ orange dress ¤ orange dress ¤ orange dress ¤ orange borders # # #
These 3 images will each be in their respective figure tag which will have the "borders" class, but each will have a specific class to determine a specific color (yellow class, blue class and orange class).
You can multiply the class without limit and add for example "left" or "right" if you want to define a CSS code to have the tags appear respectively on the left and on the right:
###789¤robe orange¤robe orange¤robe orange¤bordures orange droite###
For the small image the tag appears as class figure_zoom_small, while for the zoomed image the tag appears as a class figure_zoom_big. You can therefore customize the zoomed image in a different way from the small image.
For perfectionists it is also possible to have a very specific rendering, such as a round image, for example, be careful: depending on the image formats (width / height ratio) this result is not necessarily the most judicious:

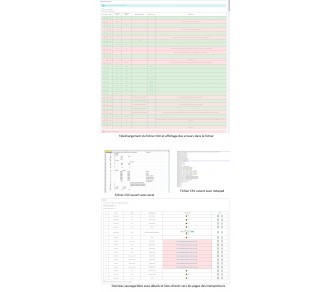
Don't slow down and weigh down the page
Increasing the size of the description and the data is good, not increasing the weight of the page and the loading time is better!
The module includes the "lazy load" option on the images: they will not be loaded when the page loads. It is a deferred loading, which is only done when the customer needs to see the image. This makes it possible not to increase the weight of the page and therefore not to slow down the loading of the page while the content will be highlighted and the images better referenced. This helps improve SEO on search engines such as Google.
As you can see in this screenshot, the loading of the images is only done during the vertical scroll:

Changelog:
1.0.0
First version
1.1.0
add CMS pages
1.2.0
full compatibility with 1.7
1.3.0
add lazy load
1.3.1
update of code CSS default
1.3.2
optimization responsive
14 other products in the same category

Floating Cart
Boost your sales with our "Sticky Add to Cart" module for Prestashop: an "Add to Cart" button that is always visible for a smooth shopping experience and an immediate increase in your conversions.
")
SQL Backup (manual/CRON/mail)
This module allows you to make SQL backups very easily from the back office, but also by CRON task with sending a copy of the database (.sql.bz2 file) by email to the administrators of your choice

Opening of submenus on hover
On the latest versions of PrestaShop the hover over submenus has been removed, put it back for free with this module. download
")
New VAT rule - Brexit (+ accounting)
This 2 in 1 module deals with managing the tax news following Brexit with the United Kingdom (Northern Ireland, and Great Britain)But also includes a complete accounting part which allows to have the accounting reports with all the details on all the invoices.

Intercept emails
Read sent emails (even locally), identify templates and personalize your emails very easily.

Delivery zones and postal codes
This module makes it possible to "divide" a country into new zones (regions, departments, postal codes ...) in order to allocate for each zone a specific carrier (or several) with a specific tariff.
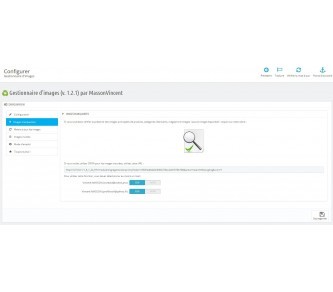

Images and thumbnails: Compression and reSmush
Easily manage your product images, categories, manufacturers, suppliers and stores with this image manager. It will allow you to avoid storing unnecessary images, indicates if there are missing images and regenerates the images very quickly.

Force the VAT number depending on the country
This module allows you to force the customer to register their VAT number depending on the country, so you can force foreigners in your country to register their VAT number.

Login to customer account without password
This module allows you to connect to the customer account very easily without asking for his password. The connection can be made from the back office, but also from the front office.
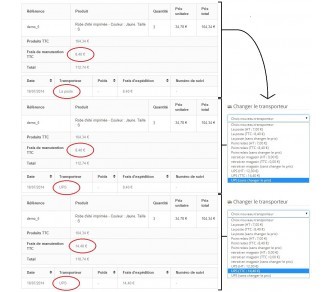

Change of carrier
This module allows you to change the carrier from the back office and modify the cost of delivery.

Secure your shop!
Your shop has cost thousands of euros, it is your livelihood, so protect it! avoid any flaws, spam, SQL / XSS injections, backup the database and main files and monitor potential attacks

VAT number
Invoice tax-free foreign business customers who have a valid VAT number on VIES after verifying the VAT numbers to avoid VAT scams and customer errors.

Images thumbnails
Improve the rendering of presentation of products by replacing the squares of colours of the attributes by thumbnails.

Hide prices easily
This module allows to hide product prices of some categories for certain customer groups but also encourage visitors to register or to connect with personalized messages.